Welcome! Let’s get your project set up. 
In Brand Bowl, brands are organized into projects, keeping everything neatly structured for you and your clients. Having a dedicated project for each brand ensures assets stay organized and easy to access. Follow this guide step by step to create your first project and get started!
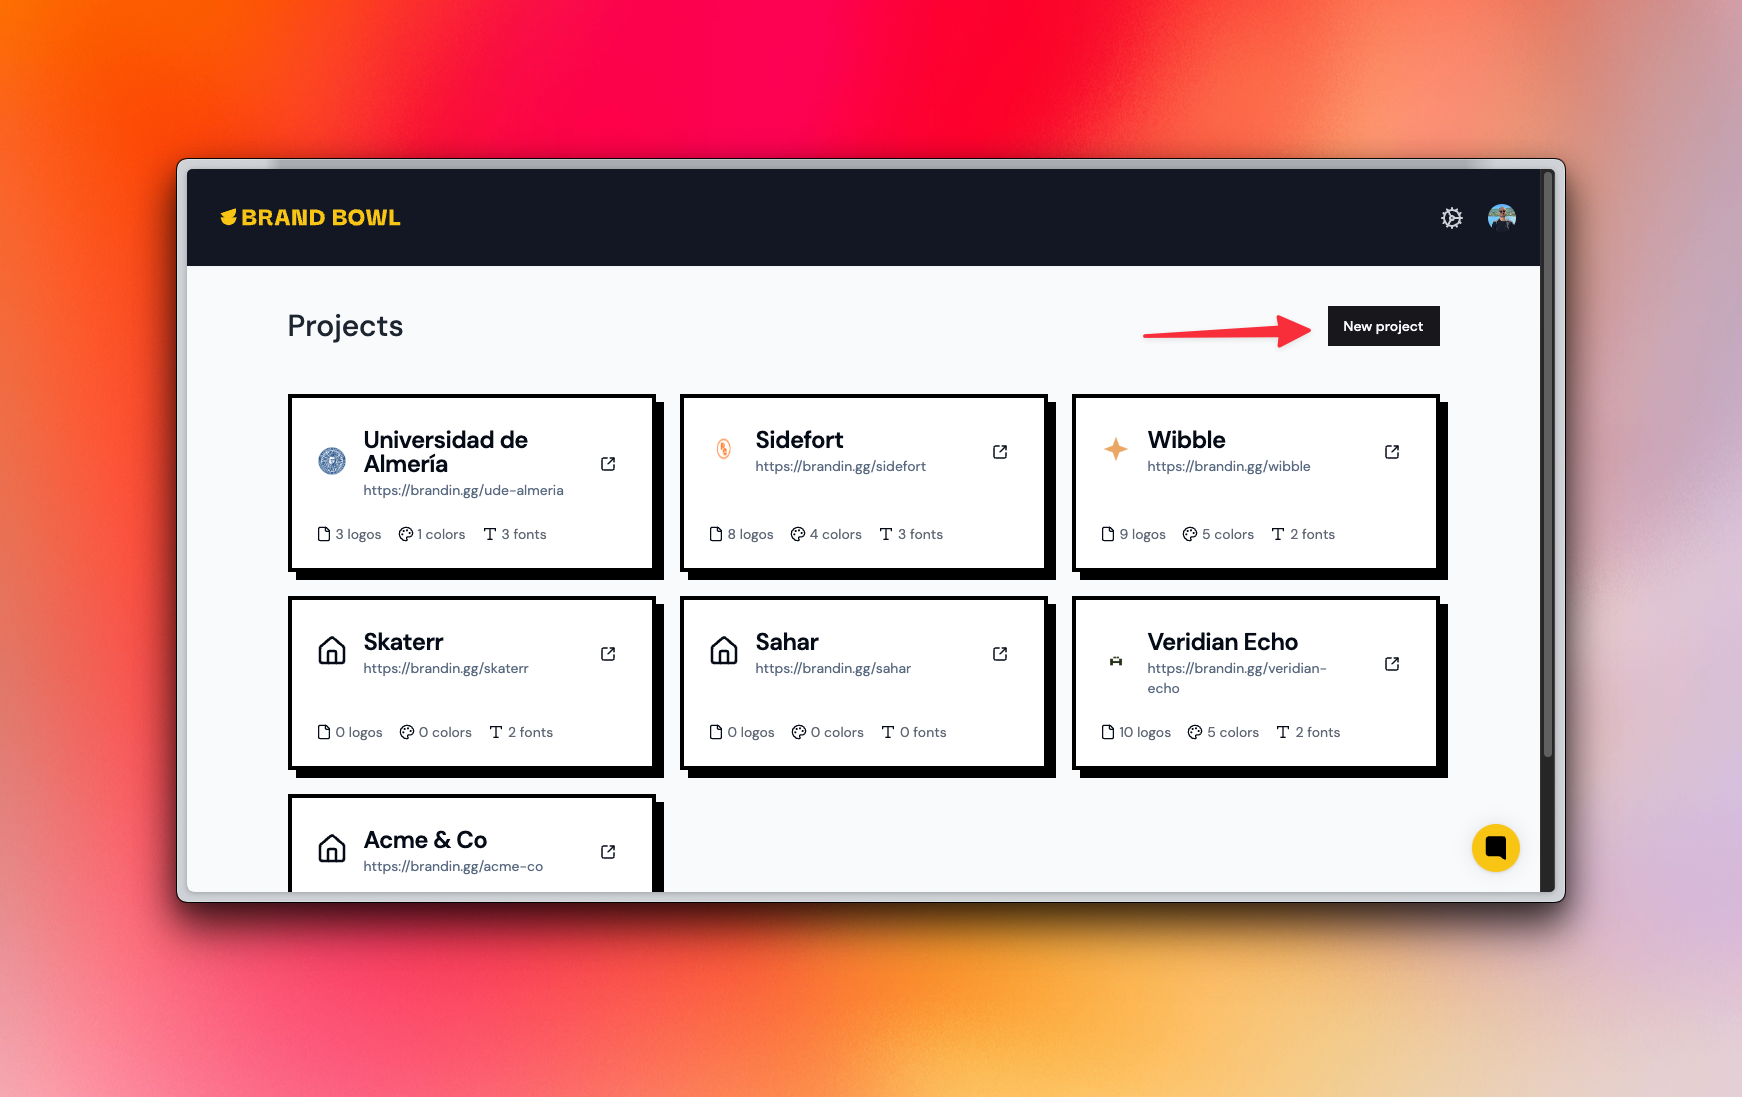
The first step to create a project is heading over to your dashboard at https://app.brandbowl.co
From the dashboard, click the “New Project” button.
In the modal that appears, fill out the key elements of your project:
Project Name: Usually, this is the name of the brand.
Description: A small optional description of what the brand is about.
Project Link: This is the URL that your clients would visit to check their branding guidelines. As you type the project name, a new URL will be generated automatically, but you can replace it for something easier to remember.
Brand’s Personality: This will help Brand Bowl select the ideal theme for the brand. Remember: You can always change the theme later!

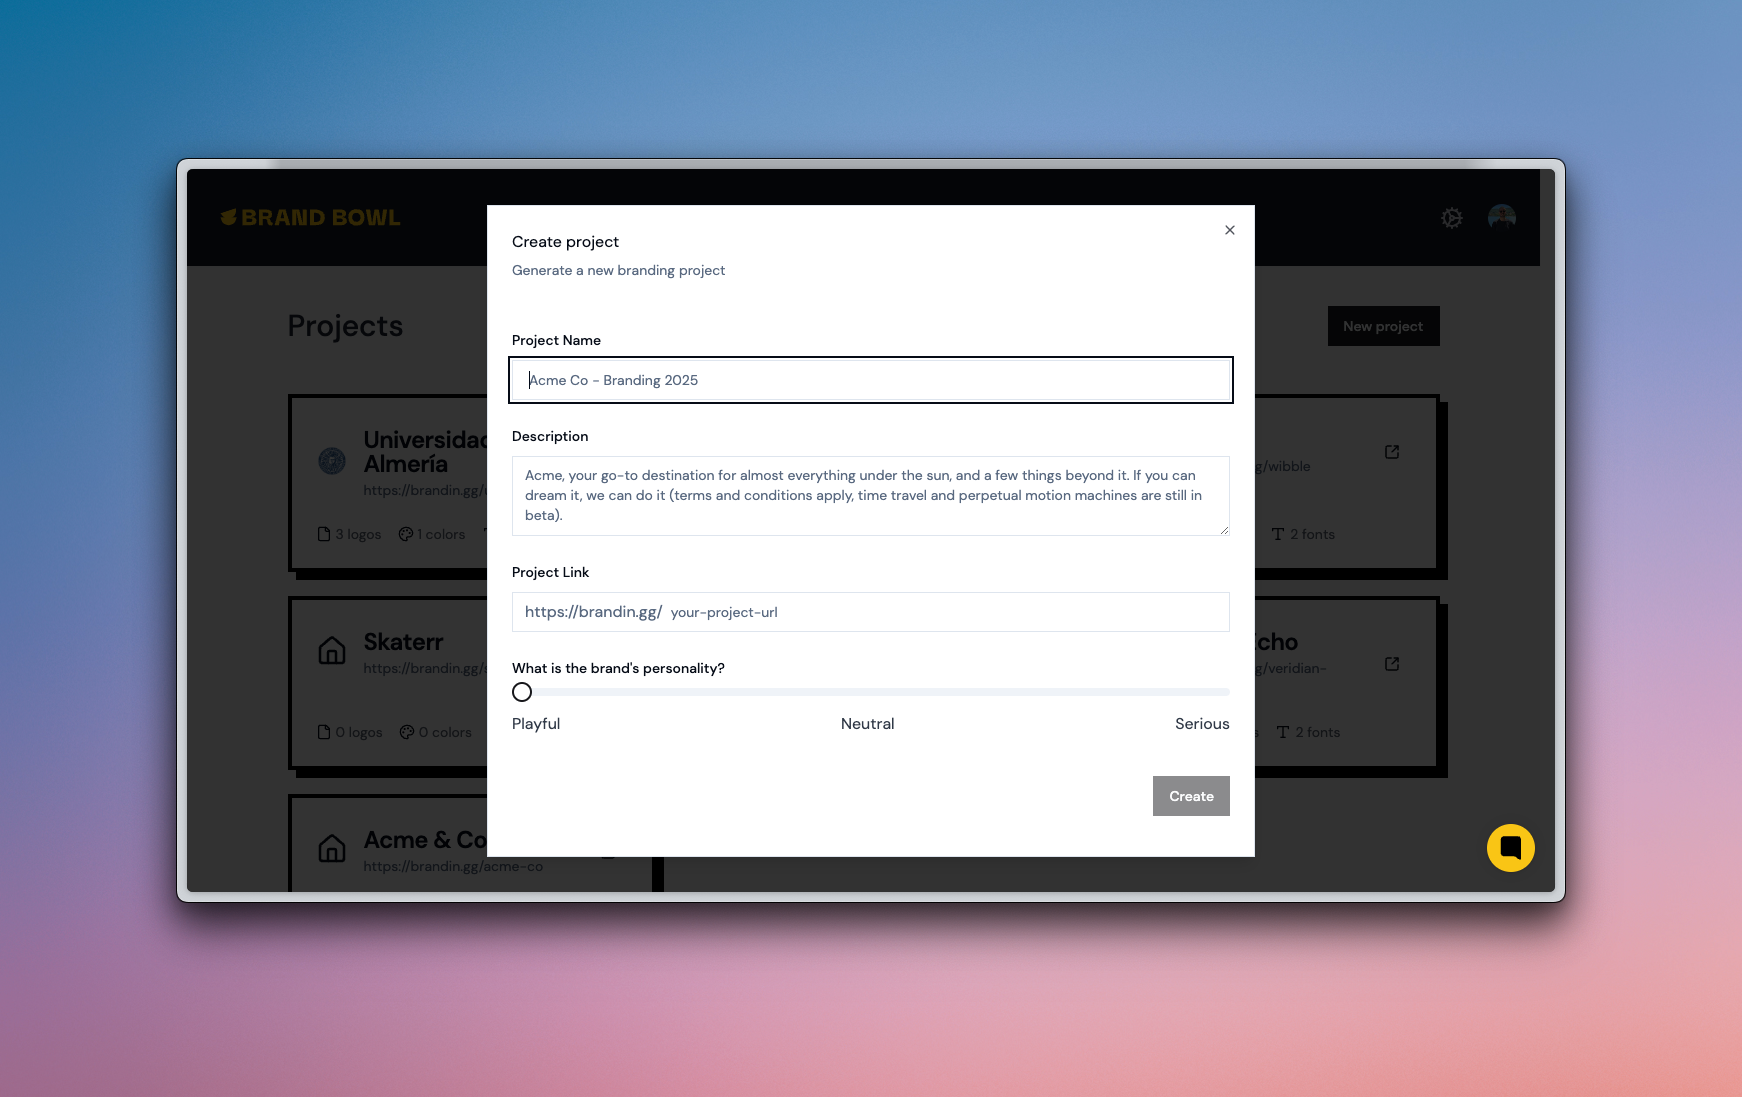
Click “Create” to create your project.
And…done! Just like that, you created a new project in your account. 
After your project has been created, the next step is uploading your logos and icons. Click on the link below to continue:
Adding logos, symbols and variants
Upload and manage all logo variants, symbols and icons.